Table of Contents
If you have ever been in a room and looked at wallpaper that’s not in good shape you know what it feels like. Maybe it is coming off in the corners rolling away from the wall or stuck in a time you would rather not think about. No matter why it is, in shape learning how to remove wallpaper is one of the most common things that homeowners do when they want to start over and give their space a new look.
It is not always simple though. Old glue can be tough to get off. Some walls have two or three layers of wallpaper on top of each other. Edges that begin to come loose can turn into an issue than you expect. The good news is that you don’t have to call a professional. With the tools and the right way to do it removing wallpaper is something that most people can do by themselves over a weekend.
In this guide we will go through five methods that actually work, from soaking and scraping to tools that are made specifically for taking off wallpaper. Before you grab a scraper though it is helpful to know what type of wallpaper you are dealing with. Vinyl, paper-backed and strippable wallpaper all behave differently. Finding that out first can save you a lot of time and stress. Make how to remove wallpaper much easier.
How to Remove Wallpaper: What You Need to Know First
Before you start removing wallpaper it is an idea to take a minute and think about what you are doing. Wallpaper removal can be tricky because not all wallpaper comes off in the way. If you use the method it can take a long time or even damage the wall underneath.
Why Wallpaper Type Matters
Some wallpaper is easy to remove. Other types of wallpaper are very hard to remove. It is helpful to know what type of wallpaper you have before you start. This way you can choose the method and save time and effort.
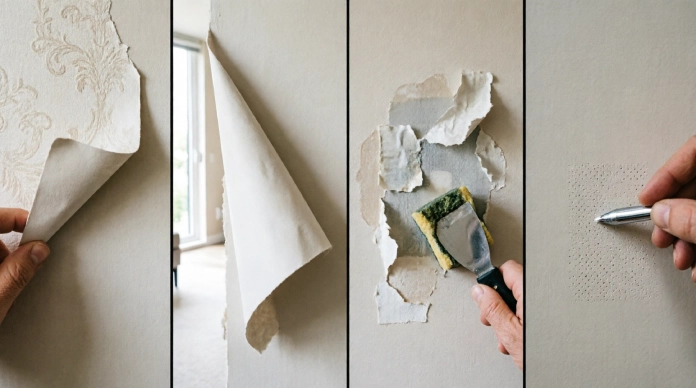
Peelable wallpaper is the type of wallpaper to remove. You can usually pull the layer off by hand. Then you will have a paper backing left that you will need to remove separately.
Strippable wallpaper is also easy to remove. You can pull it off in pieces if you pull it at the right angle. This type of wallpaper was made to be easy to remove. That is why people who like to do things themselves like it.
Traditional wallpaper is hard to remove. It is glued to the wall. You will probably need to soak it or use a steamer to get it to come off.
Vinyl-coated wallpaper has a coating that makes it last longer. This coating makes it hard to remove. You will need to score it so that water can get to the glue underneath.
Test a Hidden Section First
Before you start removing the wallpaper you should test an area that is not easy to see. You can try behind the door. In a closet. This will help you see how the wallpaper will come off. You will also see if the wall underneath is damaged.
Protect the Room Before You Start
Removing wallpaper can be messy. You should get the room ready first.
- You should put down drop clothes to protect the floor.
- You should move the furniture out of the room. If you cannot move it you should push it to the center of the room. Cover it.
- You should take off the covers on the outlets and switches. You should also turn off the power to the room.
- You should put tape or plastic on the baseboards, so they do not get wet.
Tools You’ll Need
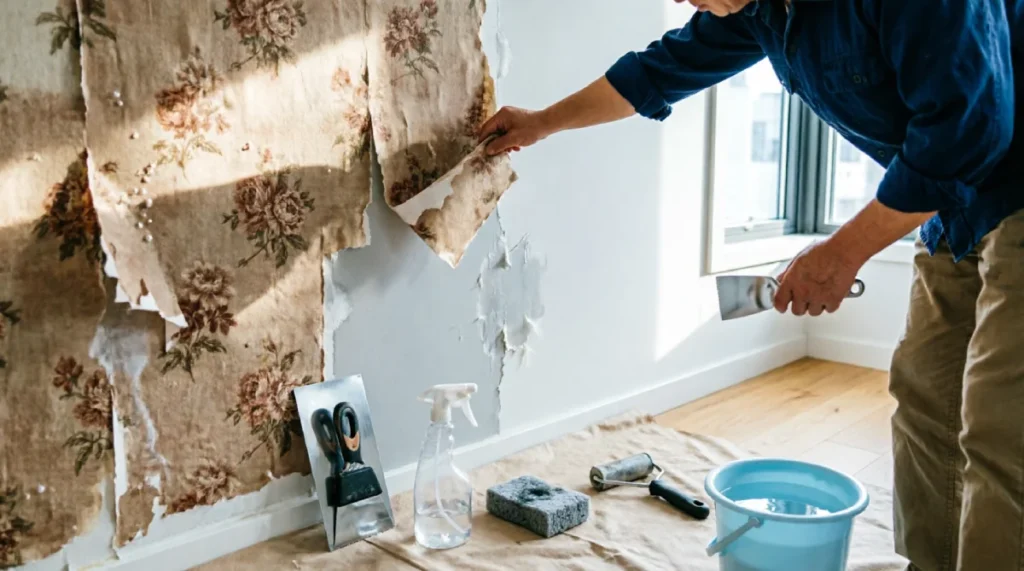
You will need some tools to remove the wallpaper. You can buy these tools at a hardware store.
- You will need a putty knife or a wallpaper scraper.
- You will need a spray bottle.
- You will need a sponge.
- You will need a drop cloth.
- You will need a scoring tool.
- You will need water.
- You will need a solution to remove the wallpaper.
- You will need a steamer if the wallpaper is hard to remove.
A Quick Safety Note
You should be careful when you are removing wallpaper. Water and electricity do not mix. You should always turn off the power to the room before you use water or a steamer near the outlets and switches. You should also make sure the room is well ventilated. You should take your time when you are working near the outlets, so you do not get them wet.
Method 1: Peel Off Wallpaper by Hand
If you’re lucky enough to have strippable wallpaper this is about as easy as wallpaper removal gets. No chemicals, no steamers, no soaking, just some patience and a bit of arm strength. Since this type of wallpaper was designed to come off the process is more about technique than tools.
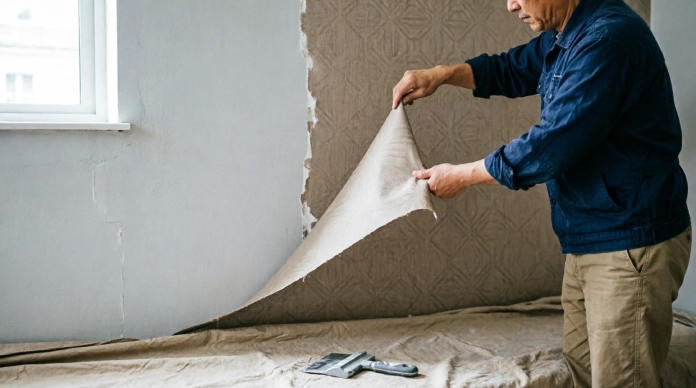
Step-by-Step Process
- Find a corner or seam. Check around outlets near the ceiling or along seams where two strips meet. There’s often a spot already starting to lift on its own.
- Gently lift the edge with a putty knife. Slide the knife under the corner enough to get a grip with your fingers. You don’t need to dig into the wall enough to separate the paper.
- Pull the wallpaper slowly at an angle. than pulling straight out from the wall pull down and across at a shallow angle. This keeps tension steady on the paper.
- Continue working across the wall. Once a strip starts coming keep pulling in the same direction until it’s fully off then move to the next section.
- Remove leftover paper or adhesive. With wallpaper a thin backing layer often stays behind. Peel this off separately. Wipe it down with warm water if it’s stubborn.
Don’t Rush It
It’s tempting to yank the paper off once it starts moving but pulling too fast can tear chunks out of the drywall or plaster underneath. Slow steady pressure gives the paper time to release cleanly without taking the wall surface with it.
If the Wallpaper Tears
Sometimes wallpaper doesn’t cooperate and tears into pieces instead of coming off in long strips. If that happens don’t force it. Switch to a putty knife to lift each torn edge or move on to a soak-and-scrape method (covered next) for any sections that won’t peel cleanly.
Method 2: Use Warm Water and a Sponge
For traditional paper wallpaper, warm water is often all you need. Most old-school wallpaper paste is water-soluble, meaning it was designed to loosen and release its grip when it gets wet. This method takes a bit more time than peeling by hand, but it’s simple, cheap, and doesn’t require any special equipment.
Step-by-Step Process
- Score the wallpaper lightly, if necessary. If the paper has any kind of coating or feels smooth and non-porous, run a scoring tool over it first. This creates tiny perforations that let water reach the adhesive underneath instead of just sitting on the surface.
- Apply warm water with a sponge or spray bottle. Soak the wallpaper generously, working in small sections rather than trying to cover the whole wall at once.
- Let it soak for several minutes. Give the water time to work its way through the paper and start breaking down the glue. Five to ten minutes is a good starting point, depending on how thick or old the wallpaper is.
- Test whether the paper loosens. Try lifting a corner with your fingers or a putty knife. If it comes away easily, you’re ready to start removing it. If it resists, it needs more soak time.
- Scrape gently with a wallpaper scraper. Once the paper has softened, work the scraper underneath at a low angle and gently push it away from the wall.
Patience Pays Off
It’s tempting to start scraping the moment you’ve sprayed the wall, but rushing this step usually just means fighting with paper that isn’t ready to come off. Giving the water enough time to fully soak in makes the entire process faster and easier in the long run, and it puts a lot less strain on the wall underneath.
Repeat as Needed
Some areas, especially spots with extra layers of paste or old paint over the wallpaper, may need a second or third round of soaking. Just re-spray, wait, and test again. It’s normal for a wall to need different amounts of soaking in different spots.
Don’t Oversoak the Drywall
While water is essential for this method, too much of it can cause problems. Excess water can soften the paper facing on drywall, leading to a fuzzy or damaged surface that will need extra patching before you can paint or re-wallpaper. Stick to misting and light soaking rather than drenching the wall and avoid leaving the water standing on the surface for long periods.
Method 3: Try a Wallpaper Removal Solution
If plain warm water isn’t cutting through the adhesive, or you’re dealing with wallpaper that’s been on the wall for decades, a commercial wallpaper removal solution can make a big difference. These products are formulated specifically to break down tough, old paste that water alone struggles with, especially adhesive that’s had years to bond and harden.
Why It Works Better on Stubborn Adhesive
Wallpaper removal solutions typically contain enzymes or surfactants that penetrate and dissolve paste more effectively than water on its own. Instead of just softening the surface, they work into the adhesive layer itself, breaking down its bonding strength so the paper releases more easily and with less scraping.
Step-by-Step Process
- Score the wallpaper. Use a scoring tool to create small perforations across the surface. This gives the solution a way to reach the adhesive underneath rather than sitting on top of the paper.
- Mix and apply the removal solution according to the product instructions. Some solutions come ready to use, while others need to be diluted with water. A pump sprayer usually gives the most coverage.
- Allow it to sit at the recommended time. Most products need anywhere from 15 minutes to an hour to fully penetrate. Check the label, since this varies by brand.
- Scrape away softened wallpaper. Once the paper has had time to loosen, use a wallpaper scraper to gently lift and remove it, working in sections.
- Wipe the wall clean. After the wallpaper is off, wipe down the wall with a damp sponge to remove any leftover residue or solution.
Test It First
Every wall and wallpaper combination reacts a little differently, so it’s worth testing the solution on a small, hidden section before treating the entire room. This confirms the product works well with your specific wallpaper and gives you a sense of how long it takes to soften.
Ventilation and Safety
Many removal solutions contain chemicals that can produce strong fumes, so good airflow is important. Open windows, use a fan, and take breaks if needed. Always follow the manufacturer’s instructions closely, including any recommendations for gloves or eye protection, since formulas can vary significantly between brands.
Method 4: Use a Wallpaper Steamer
When water and removal solutions aren’t enough, a wallpaper steamer is often the next step up. Steamers combine heat and moisture to penetrate deep into old, hardened paste, loosening it far more effectively than surface-level soaking. If you’re dealing with wallpaper that’s been on the wall for many years, this method tends to get results where others fall short.
How Steam Loosens Old Paste
Heat speeds up the process of breaking down adhesive, while the moisture in the steam works its way into the paper and paste layers. Together, they soften even old, dried-out glue that’s had decades to bond with the wall, making the wallpaper much easier to lift and scrape away.
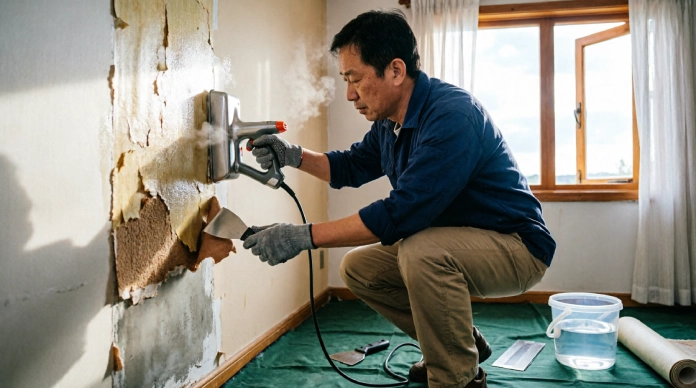
Step-by-Step Process
- Score the wallpaper. As with the other methods, scoring the surface first helps steam penetrate rather than just sitting on top of the paper.
- Fill and heat the wallpaper steamer according to instructions. Add water to the reservoir and give the unit time to heat up fully before use.
- Hold the steam plate against a small section. Press the plate firmly against the wall and hold it in place for about 10 to 15 seconds, or as recommended by the manufacturer.
- Move the steamer slowly. Work the plate across the wall in small sections, giving each area enough time to absorb the heat and moisture.
- Scrape the softened wallpaper. Right behind the steamer, use a scraper to lift the loosened paper away while it’s still warm and pliable.
Great for Multiple Layers
One of the biggest advantages of steaming is its ability to cut through several layers of wallpaper at once. If previous owners papered directly over old wallpaper instead of removing it first, a steamer can often loosen all the layers together, saving you from having to strip each one separately.
Potential Risks to Keep in Mind
Steaming is effective, but it comes with a few things to watch out for:
Excess moisture: Holding the steamer in one spot too long can oversaturate the wall, especially on drywall.
Wall damage: Too much heat or moisture in one area can soften the drywall surface itself, leading to a rough or damaged finish.
Burns from hot steam: The steam plate and the steam itself get very hot, so careless handling can easily lead to burns.
Safety Tips
Wear gloves to protect your hands from the heat and keep your face and skin away from the steam plate when lifting it off the wall. Work in a well-ventilated room, keep the steamer’s cord away from water, and never leave the unit unattended while it’s plugged in and heating.
Method 5: Combine Scoring, Soaking, and Scraping
Sometimes one method on its own just isn’t enough. Old wallpaper with multiple layers, heavy paste, or a stubborn vinyl coating often needs a combined approach that pulls together the best parts of the methods above. Rather than relying on a single technique, this method layers them together for a more thorough result.
The Combination Method
- Score the surface. Run a scoring tool over the wallpaper to create small perforations, giving water or solution a way to reach the adhesive underneath.
- Apply warm water or wallpaper remover. Depending on how stubborn the paste is, use plain warm water for lighter jobs or a commercial removal solution for tougher adhesive.
- Wait for the adhesive to soften. Give it enough time to fully penetrate, checking every few minutes rather than scraping too soon.
- 4. Scrape carefully. Once the paper lifts easily, work the scraper underneath at a low angle and peel it away in sections.
- 5. Repeat as needed. Some spots will need a second or third round of scoring, soaking, and scraping before the wall is fully clear.
Handling Multiple Layers
Walls with more than one layer of wallpaper usually need this process repeated layer by layer. The top layer often comes off first, revealing a second layer underneath that needs its own round of scoring and soaking. It’s slower going than a single-layer wall, but working through it methodically, one layer at a time, keeps the process manageable instead of overwhelming.
Dealing with Leftover Adhesive
Even after the wallpaper itself is gone, a hazy or tacky layer of old adhesive often remains on the wall. A sponge with warm water and a bit of dish soap or leftover removal solution usually clears this away. Wipe in circular motions, rinsing the sponge frequently, until the wall feels smooth rather than sticky.
Why This Method Works So Well
For difficult DIY wallpaper removal projects, especially older homes with layers of paper going back years, this combined approach tends to be the most reliable option. It takes more time and effort than any single method alone, but it also handles the toughest walls that peeling, water, solution, or steaming can’t fully manage on their own.
How to Repair the Wall After Removing Wallpaper
The wall is probably not going to be perfectly smooth after you remove the wallpaper. You will likely see holes, scratches and torn drywall paper. There might also be patches and leftover adhesive residue on the wall.
For problems you can use spackle or joint compound to fill in the holes and scratches. Let the spackle or joint compound dry. Then sand it down so it is smooth. After you fix the wall you should put a coat of primer on it before you paint the wall. This is important because the parts of the wall that you fixed the drywall that is showing and the old adhesive spots are all going to absorb the paint. If you do not put primer on the wall the paint might look blotchy and uneven.
If the wall is damaged, like if there are tears in it or if the wall is soft because it gets too wet you should probably hire a professional to fix it instead of trying to do it yourself.
The Repairing the Wall After Removing Wallpaper process is pretty simple if you follow these steps. Remember to fix the wall and then put primer on it before you paint the wall. This will help the paint look good on the wall.
Which Wallpaper Removal Method Should You Choose?
With five different methods on the table, it helps to have a quick reference for matching the right technique to your specific wall.
| Wallpaper Type or Problem | Best Method |
| Peelable wallpaper | Peel by hand |
| Strippable wallpaper | Peel and scrape |
| Water-soluble adhesive | Warm water |
| Stubborn adhesive | Wallpaper removal solution |
| Thick or layered wallpaper | Wallpaper steamer |
| Very difficult wallpaper | Combine scoring, soaking, and scraping |
5 Most Asked Questions About Removing Wallpaper
1. What is the easiest way to remove wallpaper?
The easiest way to remove wallpaper is when it is peelable you can just pull it off by hand. For traditional wallpaper you will need to use warm water and gently scrape it off.
2. Can I remove wallpaper without a steamer?
Yes, you can remove wallpaper without a steamer. You can use water; a removal solution scores the wallpaper and using a scraper to handle jobs. Removing wallpaper with steam helps, it is not always required for removing wallpaper.
3. How do you remove wallpaper that won’t come off?
When removing wallpaper that’s stubborn you should score it first then soak it with warm water or a removal solution. For removing wallpaper that’s stubborn and has many layers you can use a steamer to remove the wallpaper.
4. Should I remove wallpaper before painting?
Yes, you should remove wallpaper before painting. Removing wallpaper gives you a finish that will last longer. You should clean the wall repair it and prime it before you start painting.
5. How do I remove wallpaper glue from the wall?
To remove wallpaper glue from the wall you can wipe it with water and a sponge, or you can use an adhesive remover. You need to remove all the residue from the wallpaper glue before you prime the wall to get a finish.
Conclusion
Taking off wallpaper doesn’t have to mean hiring an expert. With the way for your wallpaper style and glue most walls can be cleaned with simple tools and some patience. Begin softly peeling or using water first and only go to stronger methods like removal products or steaming if necessary.
During the process, keep the wall below safe by not using too much water and not scraping too hard. With preparation and a little patience, you will have a clean flat wall that is ready, for new paint or a completely new look.